
Plants
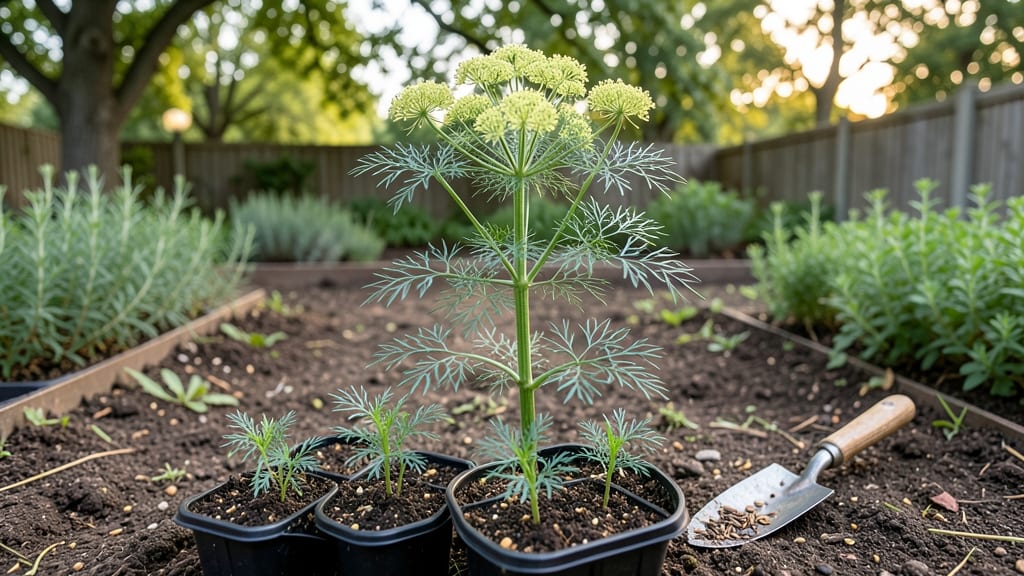
Planting dill in Zone 9 at the wrong time means bitter, bolting plants instead of the fresh, feathery herb you crave. The key to growing perfect dill here lies in understanding your local climate's quirks—like avoiding the brutal summer heat that forces early bolting.
In Zone 9, where winters are mild and summers scorching, the ideal window for planting dill is surprisingly flexible. You can start seeds as early as late winter (January) for a spring harvest, or wait until early spring (March) when soil temperatures hit 50°F consistently.
This timing ensures your 🌿 dill thrives without rushing into bolting.
But here's the catch: if you plant too late, your dill might bolt before you can enjoy those flavorful leaves. I'll show you exactly how to time it right—whether you're growing in garden beds or containers on a balcony—so you get a steady supply from spring to early summer.
Ready to grow dill that stays fresh and flavorful? Let's dive into the best planting strategies for your Zone 9 garden, including soil prep, watering tips, and how to extend your harvest season without the stress.
Optimal planting windows for dill in Zone 9 to avoid bolting
If you've ever planted dill in Zone 9 only to watch it bolt prematurely into flower, you're not alone. The key to preventing this is understanding dill's temperature sensitivity and aligning your planting schedule with Zone 9's unique climate patterns.
Unlike cooler zones, Zone 9 offers two distinct planting windows—fall and spring—that work perfectly to keep your dill thriving.
Dill bolts when exposed to prolonged heat or long daylight hours, which is why timing is everything in our warm climate. The ideal soil temperature for germination is between 60-75°F, but once established, dill prefers cooler conditions to prevent bolting.
Let's break down the best times to plant for continuous harvests without the frustration of early flowering.
Comparison Table: Best Planting Windows for Dill in Zone 9
| Planting Window | Best Months | Soil Temp (°F) | Daylight Hours | Key Advantages |
|---|---|---|---|---|
| Fall Planting | Late August - September | 60-75°F | 12-13 hours | Cooler nights prevent bolting; harvest before winter |
| Spring Planting | January - February | 55-65°F | 10-11 hours | Avoids summer heat; longer growing season |
| Extended Fall | October - November | 50-60°F | 11-12 hours | Protect with row covers; harvest before frost |
For Zone 9 gardeners, the fall planting window (late August to September) is often overlooked but yields the most reliable results. During these months, daytime temperatures remain warm enough for germination while nights cool down, creating perfect conditions for dill to grow without bolting.
This timing also allows you to harvest fresh leaves before the first frost, which typically arrives around mid-December in Zone 9.
If you prefer a spring harvest, aim to plant dill in January or February, when soil temperatures are still cool but warming up. This early start gives your dill a head start before the summer heat arrives.
The key is to get seeds in the ground before soil temperatures exceed 70°F, as this triggers bolting. Use a soil thermometer to monitor conditions—this small investment can save you from wasted seeds.
To extend your harvest season, consider succession planting every 2-3 weeks during your chosen window. For example, if you start with fall plantings in late August, follow up with another round in mid-September.
This staggered approach ensures you always have fresh dill available while avoiding the pitfalls of planting too late in the season.
One common mistake in Zone 9 gardening is waiting until spring to plant dill, only to see it bolt by May. The intense heat and long daylight hours of summer push dill into flowering mode quickly.
By planting in fall or early winter, you're working with the natural climate rhythms of your region to keep your dill productive and flavorful.
For container gardeners or those with limited space, shade cloth can be a game-changer. During the hottest part of the day (12 PM - 3 PM), drape 30-50% shade cloth over your dill plants to reduce heat stress.
This simple trick can extend your growing season by several weeks and prevent premature bolting, even if you plant during the less ideal spring window.
Remember that dill thrives on consistency. Once you establish your planting schedule, stick with it year after year. Your plants will thank you with lush foliage, bold flavor, and a steady supply of fresh leaves for your favorite recipes.
With these timing strategies, you'll finally get the bolting-free dill you've been dreaming of!
Step-by-step guide: preparing and planting dill for Zone 9 success
Zone 9’s warm winters and intense summers demand a strategic approach to growing dill. The key is preparing your soil and seeds at the perfect time to avoid bolting—when dill flowers prematurely and loses flavor.
Start by testing your soil’s pH (6.0-7.0) and amending it with compost or aged manure to ensure your dill gets the nutrients it needs to thrive.
Once your soil is ready, focus on timing. Dill seeds germinate best in soil temperatures between 60-75°F. In Zone 9, this means waiting until late winter or early spring (February to March) when the ground warms up naturally.
If you plant too early, cold soil can delay germination or cause rot.
🌱 Step-by-Step Planting Guide for Zone 9 Dill
-
Step 1: Choose the Right Location
Select a spot with 6+ hours of sunlight daily. In Zone 9, afternoon shade helps prevent heat stress during peak summer months. -
Step 2: Loosen the Soil
Use a garden fork to loosen soil to a depth of 12 inches. Mix in 2 inches of compost to improve drainage and fertility. -
Step 3: Plant Seeds at the Right Depth
Sow seeds 1/4 inch deep, spacing them 12-18 inches apart in rows 18 inches apart to allow for air circulation. -
Step 4: Water Gently
Keep soil consistently moist (not soggy) by watering early in the morning. Use a spray nozzle to avoid disturbing seeds. -
Step 5: Thin Seedlings
Once seedlings reach 2 inches tall, thin them to 12-18 inches apart to reduce competition for nutrients and light. -
Step 6: Mulch for Retention
Apply 1-2 inches of mulch (straw or shredded leaves) to retain moisture and suppress weeds, especially during Zone 9’s dry spells. -
Step 7: Fertilize Lightly
After 4-6 weeks, apply a balanced fertilizer (5-10-10) at half-strength to encourage lush growth without overstimulating bolting.
For a continuous harvest, practice succession planting every 2-3 weeks from February to April. This ensures you always have fresh dill on hand, whether you're using it in salads, soups, or pickling.
In Zone 9, avoid planting dill after May, as the heat will likely cause it to bolt within weeks.
Monitor your dill closely for signs of stress, like yellowing leaves or wilting, which can indicate overwatering or underwatering. Dill in Zone 9 also benefits from regular pruning—snip outer stems to encourage bushier growth and prevent legginess.
With the right care, your dill will stay flavorful and productive until early summer.
Pro tip: If your dill starts bolting too soon, harvest the stems immediately and use them in recipes. This redirects the plant’s energy toward leaf production rather than seed development. With these steps, you’ll enjoy homegrown dill all season long—without the frustration of early bolting! 🌿